

Reverse Engineering McDonald's Holiday Pie
Breaking down the cult favorite holiday pie, and building it back up into. . . the exact same thing.

McDonald's Holiday pie has a cult-like following. People across the country count down to its release every year. In the off-season, they try to create DIY versions to share across the internet. Most of them create a delicious hand pie but fail to recreate McDonald’s Holiday pie.
Jump to Recipe
The problem most seem to make when attempting to recreate the holiday pie is that they make it too good. I had this same problem until I thought about the logistics of how McDonald’s is producing these pies, and I realized the easier the better. They want the fastest, cheapest, easiest to produce product possible. That’s where we find the answer to making the holiday pie. Even though, for people like me, this can be an unsatisfying conclusion.
What’s in the pie?
The best place to start is at the beginning, so let’s take a look at what exactly is in the holiday pie.
Ingredients: Milk, Enriched Flour (bleached Wheat Flour, Niacin, Reduced Iron, Thiamine Mononitrate, Riboflavin, Folic Acid), Palm Oil, Sugar, Water, Contains 2% Or Less Of: Modified Food Starch, Topping (sugar, Corn Starch, Hydrogenated Cottonseed Oil, Confectioner's Glaze, Yellow 5 Lake, Carnauba Wax, Yellow 6 Lake, Blue 1 Lake, Red 40 Lake), Sodium Alginate, Calcium Sulphate, Disodium Diphosphate, Tetrasodium Diphosphate, Salt, Cream Of Tartar, Potassium Sorbate (preservative), Natural And Artificial Flavors, Caramel Color, Turmeric And Annatto (color), L-cysteine (dough Conditioner), Yellow 5, Yellow 6.
As you can see there are a lot of random chemicals which can be intimidating when trying to recreate a recipe. They can pretty much be categorized as flavorings, colors, thickeners, and preservatives. For the most part, home bakers can ignore this stuff, but for a recipe that’s a little tricky to nail down, it might hold the key.
The macro ingredients are pretty straightforward. Flour, sugar, milk, water, and fat. All the basics that you would expect to see in a pie recipe, but the devil is in the details. In other words, the micro-ingredients which is how I refer to the ingredients listed as being less than two percent of the recipe.
I don’t bother getting too deep into most of these ingredients, most of them are flavors and thickeners so I’ll gloss over those. However, one thickener that caught my eye is modified food starch. Simply put modified food starch is usually corn starch that’s been heated so it will absorb much larger amounts of water, therefore, thickening the mixture. This is used in every instant pudding mix on the shelf. Seeing this makes the filling recipe really easy. It’s instant pudding, most likely extra thick, but it means we don’t need to make a fancy pastry cream even if it would be a great way to upscale this recipe.
I also noticed cream of tartar on the list. Cream of tartar is an acid that is often used to stabilize meringues, add acidity, inhibit sugar crystalization, and add leavening in the presence of baking soda. So, it does a lot of things. This one is a little trickier to nail down as to its purpose in this recipe.
3. Breaking down the pie
At this point, I can’t go much further without getting my hands on a pie and picking it apart.


The first thing I notice is the pastry. It’s very pale in color, and it’s somewhere between crumbly and flaky. This gives me a few ideas as to the makeup of the pastry crust. The crust looks and tastes very close to a standard pie dough, but has a noticeable taste of flour and is a little crumblier.
The classic pastry shell called Pâte Brisée is a great place to start. Looking back at the ingredient list we see everything we need for a pâte brisée with one glaring exception. Palm oil. I always opt for butter in a pastry shell, but to get as close to a recreation as possible I will be using shortening, lard works really well too. Palm oil just isn’t easy to find, and is not great for the environment.
Next is the filling. This is the part that most recipe attempts get wrong. Many include cream cheese which sounds delicious but is very different than the filling that comes from McDonald’s. Which is very yellow in color, thick but smooth in texture, and the flavor is kind of mild but distinctly vanilla.
It seems pretty obvious to me that the filling will be some form of extra-thick vanilla pudding. Or thicc-nilla as I’ve come to call it throughout this process.
At this point, I look back to the list of thickeners on the ingredient list: Sodium Alginate, Calcium Sulphate, Disodium Diphosphate, Tetrasodium Diphosphate. All of these are confectionary thickeners that I’m guessing are used in combination with the modified food starch to create the thicc-nilla filling. A lot of the time these extra thickeners and chemical stabilizers aren’t needed in the home kitchen, but they might be the difference between recreating your favorite food item and getting a lame imposter.
Luckily in looking for a lazy first version of this pie I bought some Jello instant vanilla pudding, and noticed that it had some similar thickeners included. This made it really easy.
4. Debugging and refactoring the first pass
After spending too much time breaking down the official ingredients list, and reading clone recipes I decided to jump in with a simple first draft. I started really simple with a classic shortening pie crust, and Jello instant vanilla pudding with half the recommended amount of milk.
I was immediately struck by how much darker the pastry baked, and how much of the filling spilled out on the pan. However, the taste was pretty good. A little too good.
The first main problem to figure out is the filling. Will this require some of those missing thickeners? This is probably why the clone recipes use cream cheese, but that does fundamentally change the flavor.
Next is the pastry dough. It tasted great but noticeably flakier, better browned, and less floury than McDonald’s version. My first thought is that this is where the cream of tarter from the ingredient list fits in.
Cream of tartar creates an acidic environment that will break down some of the proteins in the dough, and make the crust more tender. Lowering the ph will also reduce browning since the Maillard reaction needs a basic environment. This will most likely give us the pale crust that stays tender even if over-mixed. Which happens easily in large industrial kitchens.
Putting it all together
After all of this, how does it all come together? Overall this is a pretty simple recipe with a couple of optional steps added in order to get closer to the McDonald’s pie. So here’s the process.
Recipe
Filling
2 x 3.4 oz packages of instant vanilla pudding
2 tablespoons of Funfetti cake mix (any vanilla cake mix or AP flour also works)
2 1/2 cups milk
Crust
2 cups all-purpose flour, plus extra for dusting
1 tablespoon sugar
1 teaspoon salt
1 cup shortening
1/2 cup cold water
1/4 teaspoon cream of tartar
OR
1 box of 2 frozen pie crusts
Topping
1/2 cup confectioners sugar
2 tablespoons water, more if needed
sprinkles
Directions
Making the filling
This is the easy part. Instant pudding gives us almost everything we need. It will just need to be a little more concentrated than the recipe on the box recommends to make the thicc-nilla, and it will need to be made with cow’s milk. Non-dairy milk tends to not thicken very well, and a little cake mix keeps the filling thicc in the oven.
So it’s as simple as measuring cold milk into a bowl, pour in your instant vanilla pudding mix, cake mix, and whisk until smooth.
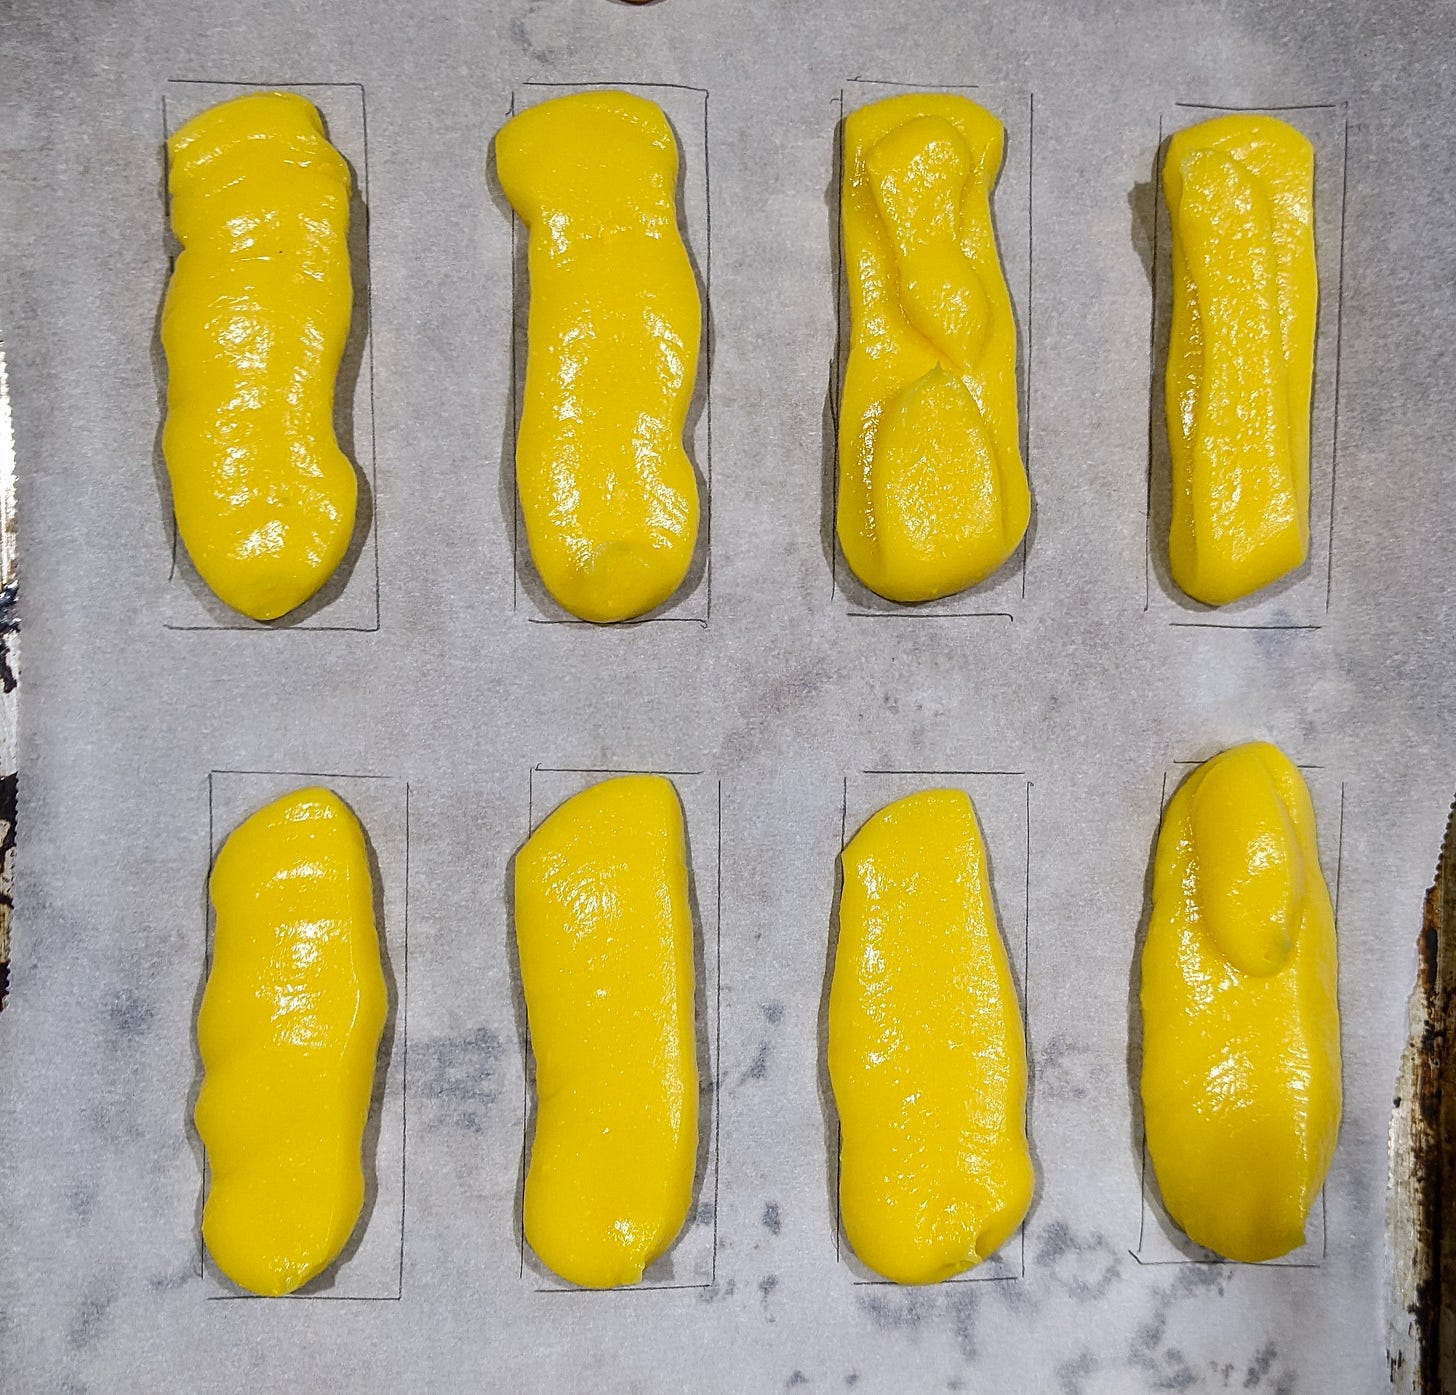
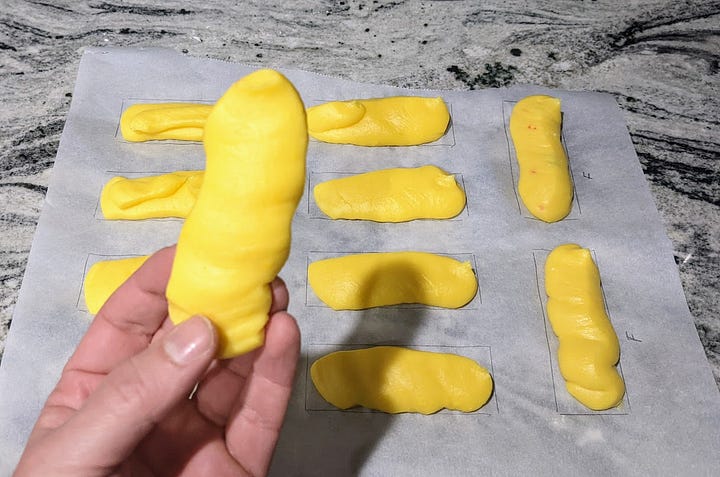
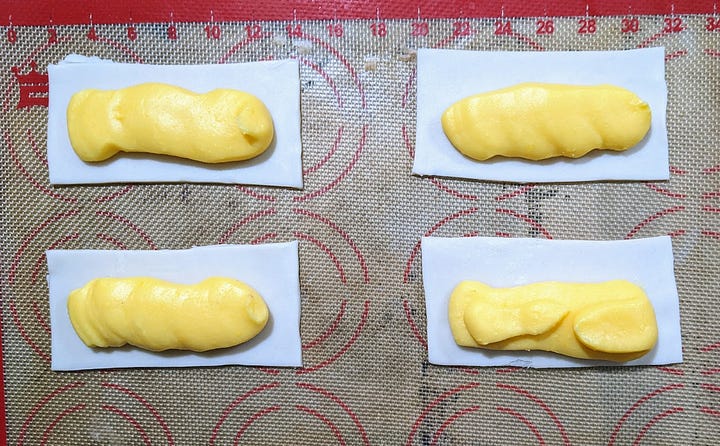
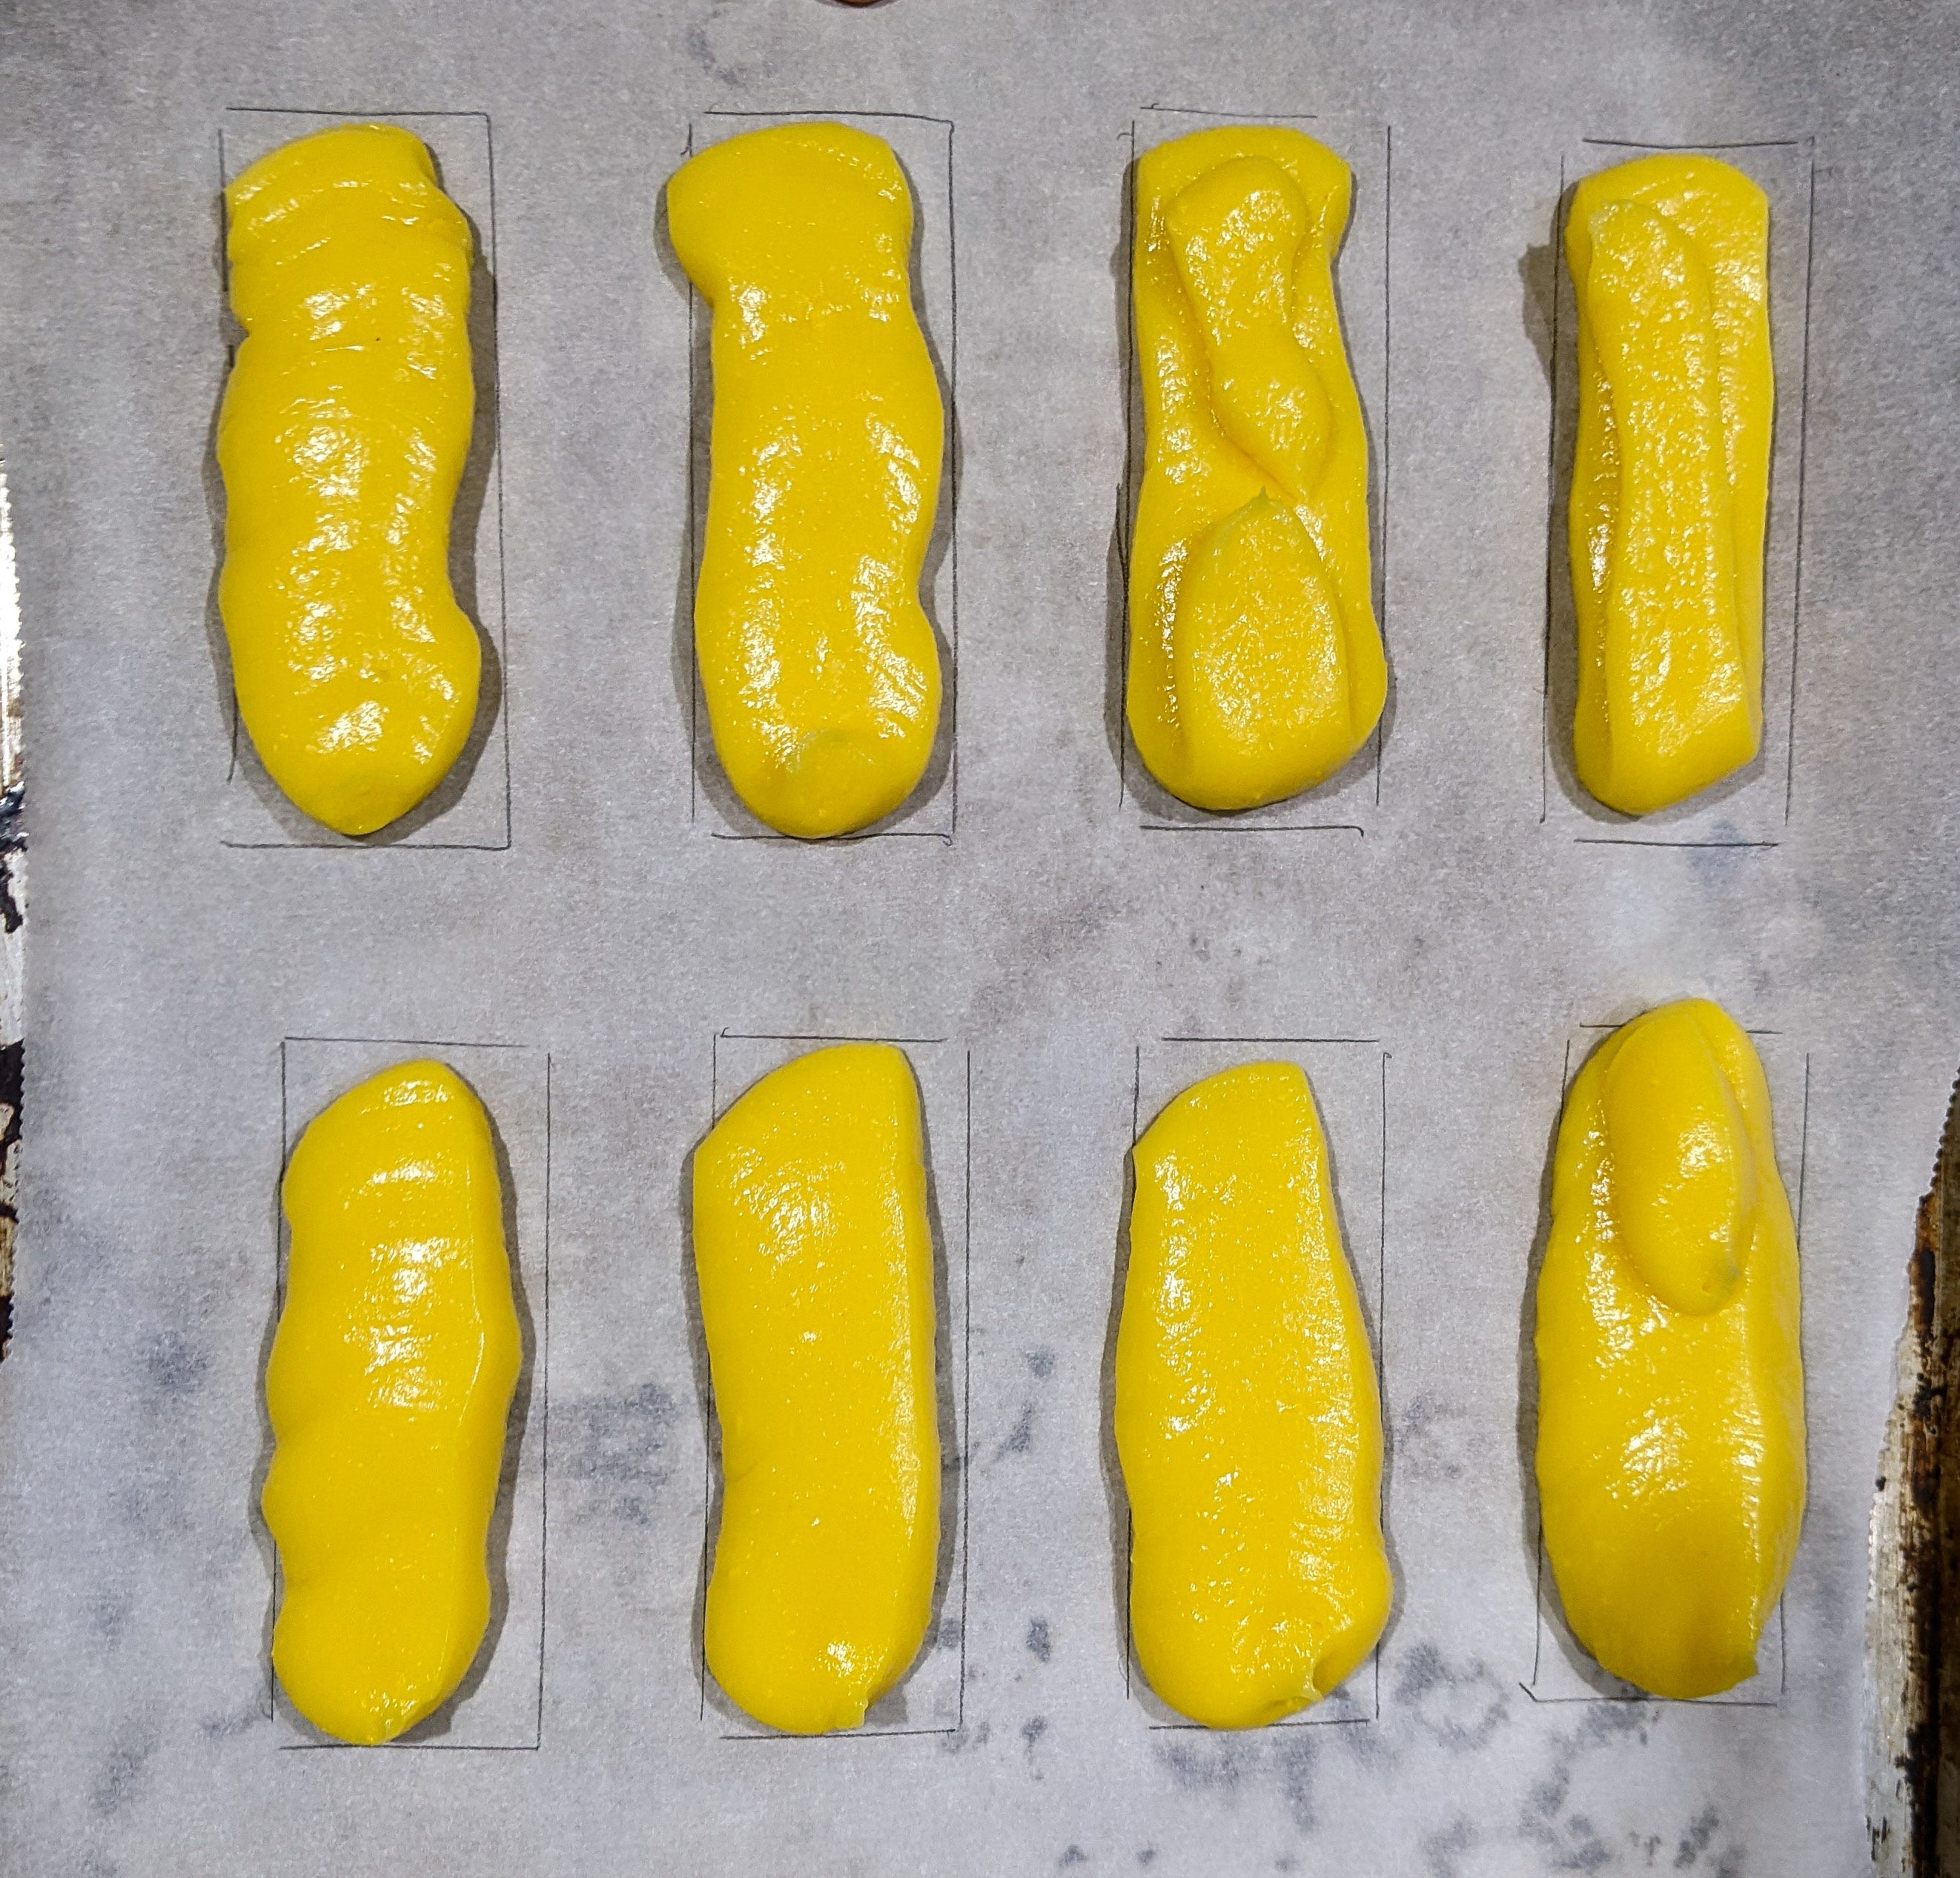
This step is optional but makes assembly much easier. Draw rectangles 4 x 1 1/2 inches on a piece of parchment paper, then flip it over on a sheet pan so the ink is facing down. These rectangles act as a template to form the filling. Now either pipe or spoon the filling into those rectangles, no need to be too precise, then freeze for a couple of hours or longer.
Making the pastry dough
There are two options for making the pie crust. A from-scratch version that gets us really close to the McDonald’s version, and a simple modification to a store-bought pie crust that is easy and delicious, and gets us 90% of the way to the original.
From-scratch dough: I think the best, and easiest method, is the food processor method of making pie crust. In this case, it makes it really easy to combine the ingredients, and slightly over mixing, by pie crust standards, in order to achieve that slightly crumbly and almost flaky texture. But this can be mixed by hand also.
Start by adding the flour, sugar, and salt to a food processor, and pulse a couple of times to combine. Then add the shortening in individual spoonfuls, mix the cream of tartar into the cold water, and pour into the food processor. Now pulse 20 times taking breaks to scrape down the sides and bottom of the food processor bowl as needed. It should look like the dough is starting to come together. Scrape the sides and bottom of the food processor, and pulse another 15 times. Remove the dough from the food processor, form into a disc, wrap it in plastic and refrigerate for an hour or more.
Store-bought dough: The goal is to just work the dough a little to get the texture we are looking for, the only difference from the scratch version is that it will be missing the cream of tartar. Start with a box of two frozen pie doughs that have been thawed. Sprinkle your work surface with flour, and knead the pie dough for 60-90 seconds adding more flour if it begins sticking to your surface.
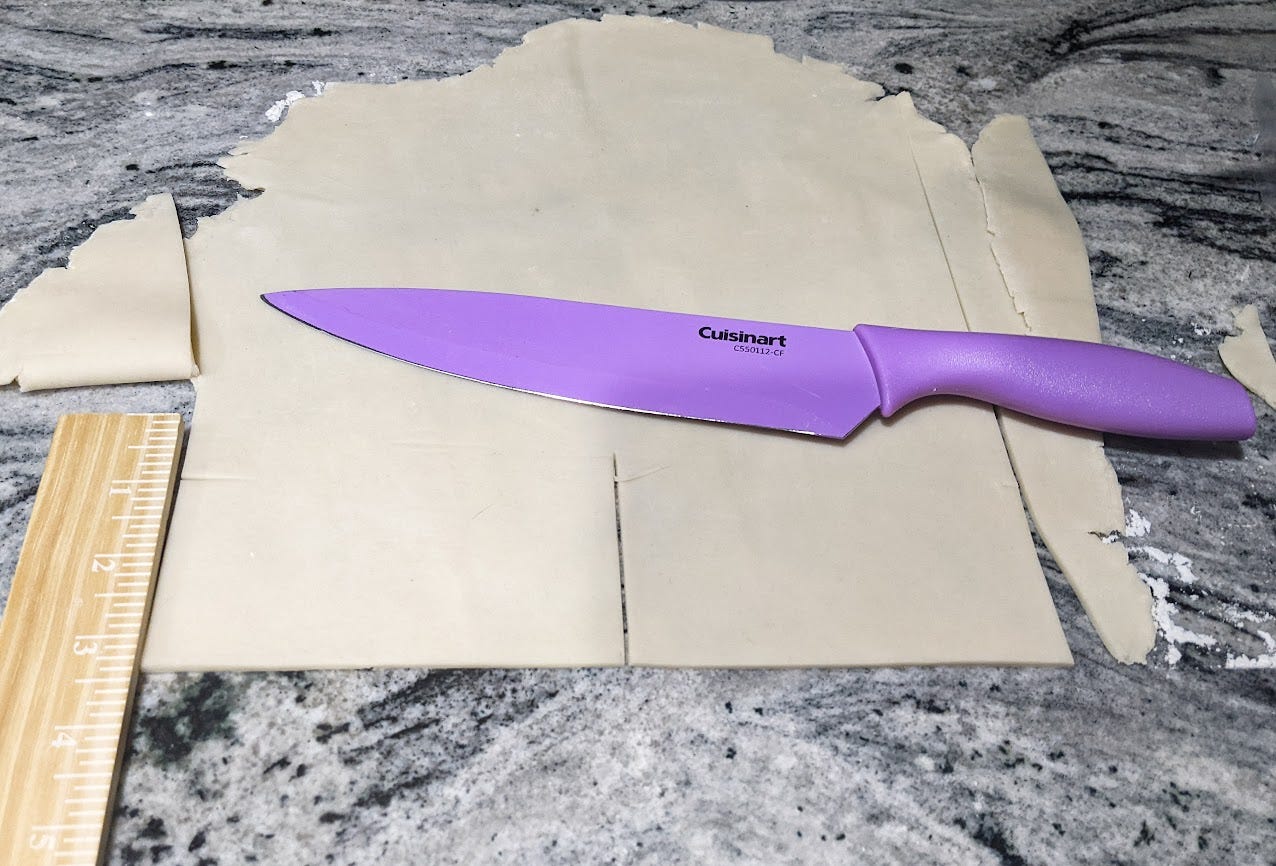
Next step, flour your work surface and roll out your pastry dough into a large rectangle about 1/8th of an inch thick. I measured six rectangles with the dimensions of 5 x 2 1/2 inches, and six rectangles of 6 x 3 1/2 inches. The tops will be a little larger so they can dome over the filling and still fit nicely.
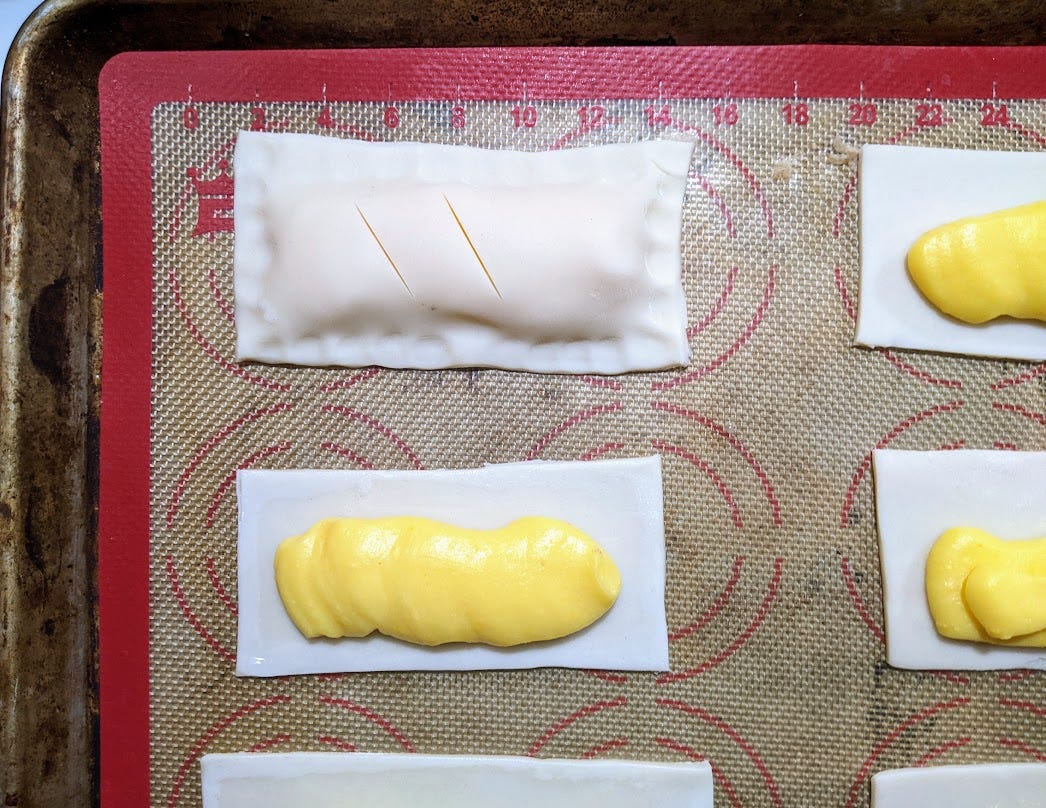
Preheat oven to 350° F. If pre-freezing the filling, peel off the parchment and place them in the center of the smaller pastry dough rectangles. Otherwise, spoon the filling into the center of the smaller rectangles making sure to leave half an inch border all the way around.
Brush a little water around the edges of the bottom crust, then drape the larger dough rectangle over the filling matching the edges with the bottom crust. Crimp the top crust with the bottom using your fingers or a fork, it’s just important to seal the crust all the way around to prevent the filling from leaking.

Trim any uneven edges of the pastry dough, and add a couple of cuts on the top crust to vent steam, and you’re ready to either freeze or bake.
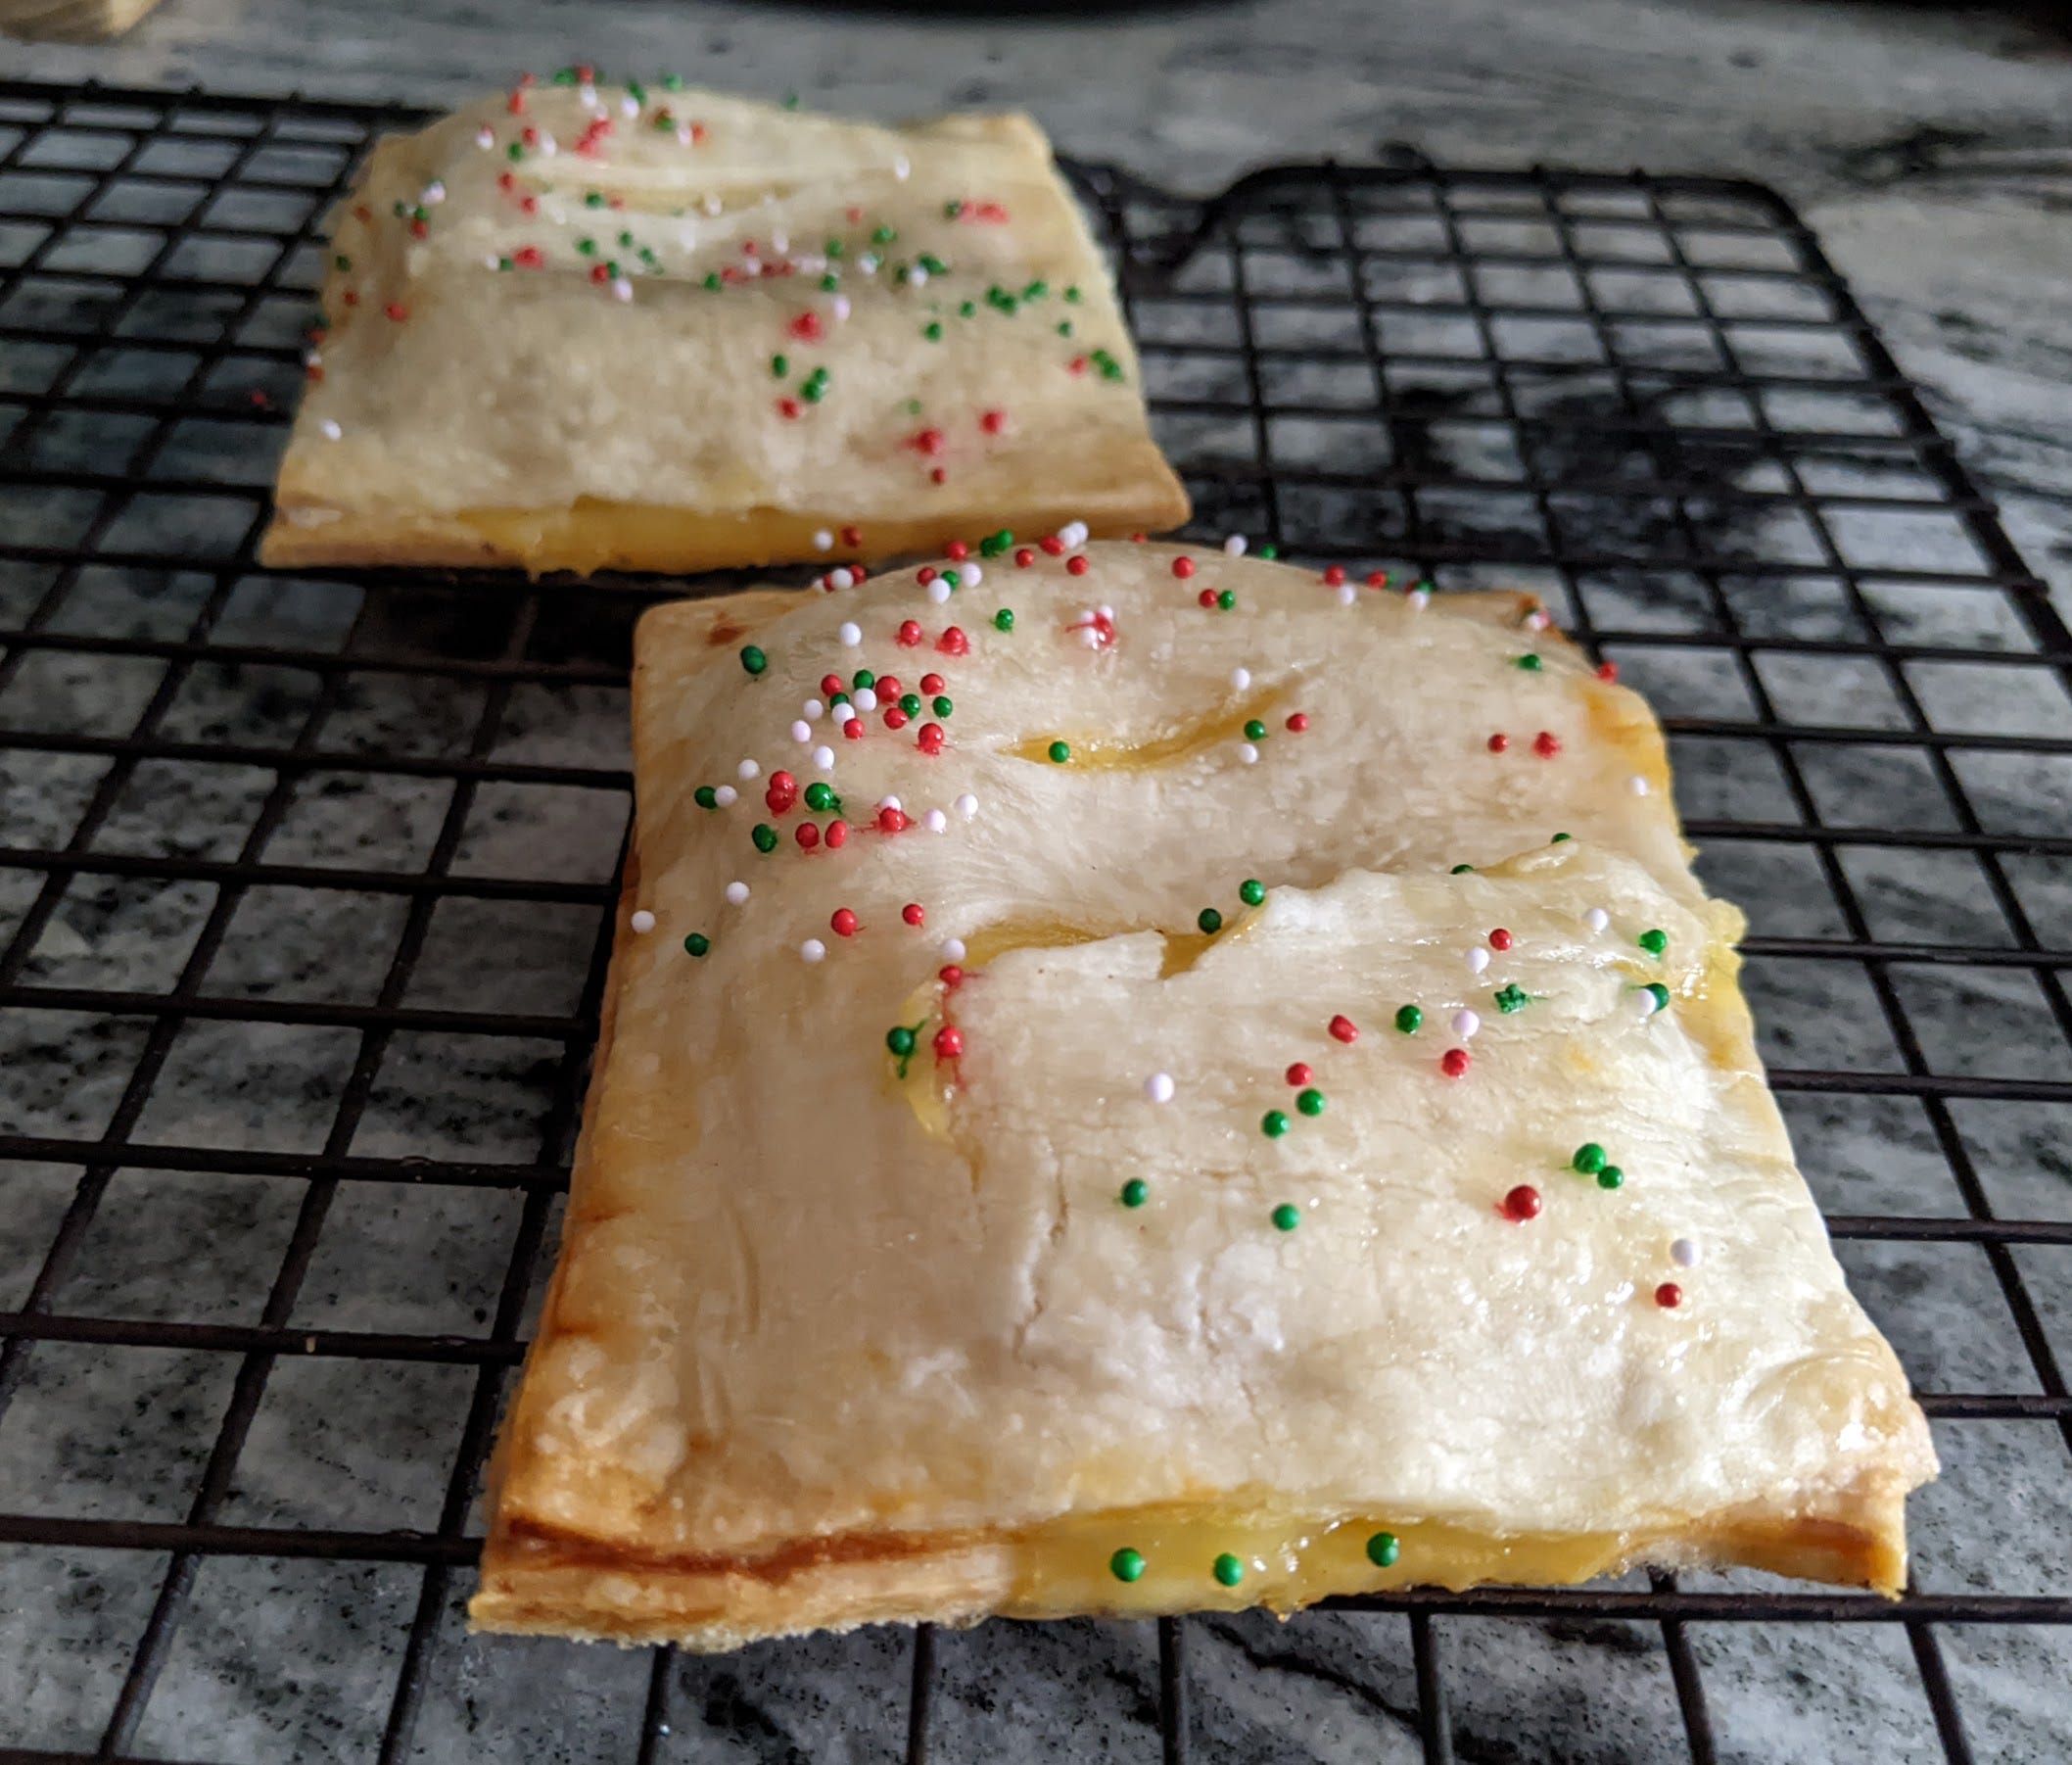
Bake for 25-30 minutes. The edges should start to turn slightly golden brown, and the center of the pastry dough should look dry, and no longer translucent.
Make the topping
Mix one tablespoon of water into the confectioner’s sugar until combined. Then add the second tablespoon of water to thin out the glaze. Add extra water if needed.
Brush the glaze on the pies while they are still hot, and add sprinkles.


Notes
Butter tastes better than shortening in a crust, and working the crust less makes a nice flaky crust but neither is true to the original.
These pies freeze well to bake any time, just make sure to wrap them tightly to prevent freezer burn, thaw, and bake as usual.